
- White horizontal lines or streaks on every page → Section 3: Mild Clog — Automatic Cleaning
- One color is completely missing (for example, no yellow at all) → Section 4: Moderate Clog — Manual Cleaning by Brand
- Printer produces entirely blank pages, ink levels are shown as full → Section 5: Severe Clog — Deep Cleaning Methods
- Already tried cleaning twice or more, still broken → Section 5: Deep Cleaning
- Want to stop this from happening again → Section 8: Prevention
- Wondering whether to fix or replace → Section 7: When to Replace
Section 1: What Actually Is a Clogged Print Head?
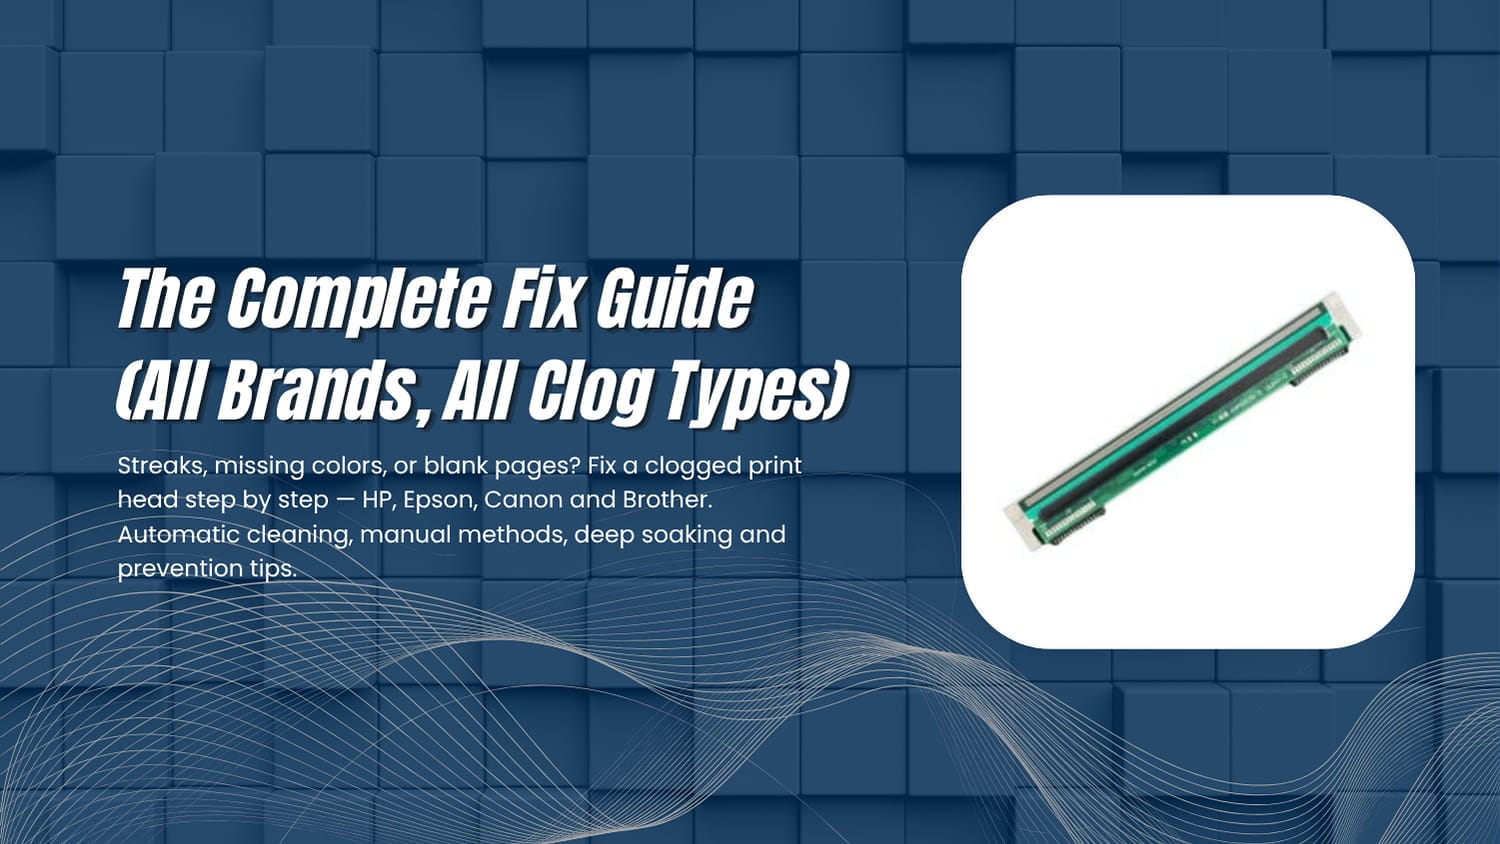
The print head is the component inside your inkjet printer that fires microscopic droplets of ink through tiny nozzles onto paper. Each nozzle is roughly half the width of a human hair. When ink sits in those nozzles without being used, it dries and hardens, blocking the channel. The result is streaks, missing colors, or no output at all.
There are three levels of clog, and the method you need depends entirely on which level you are dealing with:
- Mild: Some nozzles are partially blocked. Streaks or faint lines appear. Automatic cleaning usually fixes this.
- Moderate: Several nozzles are fully blocked. One or more colors are missing. Requires manual cleaning.
- Severe: Most or all nozzles are blocked. Pages come out blank. Requires deep cleaning or soaking.
Acting quickly matters. A fresh clog from a week of no printing is easy to clear. A clog that has been sitting for months can permanently damage the nozzles if the wrong cleaning method is used or if no action is taken at all.
Section 2: Clogged Print Head Symptoms & How to Diagnose
Not every print problem comes from a clogged head. Before you clean anything, confirm that the print head is actually the cause.
Common symptoms of a clogged print head
- Horizontal white lines or banding across text and images — the most reliable sign. This happens when one row of nozzles is blocked and ink cannot reach the paper in that path.
- A single color completely absent — for example, prints look yellow-green because cyan is missing, or skin tones are orange because blue is blocked.
- Colors appear shifted, dull, or wrong — partial blockage in one or more channels changes the color mix.
- Faded or light prints despite full ink levels — multiple nozzles are partially blocked, reducing overall ink volume.
- Entirely blank pages — severe blockage across all nozzles, or the head is so clogged that no ink passes through.
- Ink level indicator shows low or empty when cartridge is new — blocked nozzles can cause incorrect ink sensor readings on some models.
How to run a nozzle check to confirm the problem
A nozzle check prints a test pattern that shows exactly which nozzles are working and which are blocked. Always run a nozzle check before attempting any cleaning, so you know what you are dealing with.
On HP printers: Go to Control Panel → Devices and Printers → right-click your printer → Printing Preferences → Services tab → Print Quality Diagnostics.
On Epson printers: Go to Start → Devices and Printers → right-click your printer → Printing Preferences → Maintenance tab → Nozzle Check. Alternatively, press and hold the power button on the printer itself for three seconds.
On Canon printers: Open the printer’s maintenance utility on your computer, select Test Print, then Nozzle Check. On the printer itself, hold the Stop button for five seconds.
On Brother printers: Press Menu → Ink or Ink Management → Test Print → Print Quality.
If the test pattern shows broken lines, missing segments, or gaps in any color row, you have a clogged print head. If the pattern looks complete and clean, the problem may be elsewhere (driver issue, wrong paper settings, or low ink that the sensor is misreading).
Problems that are not a clogged print head
- Smearing or smudging ink — usually a paper type mismatch or a dirty rubber roller, not a clog
- Ink bleeding at the edges — too much ink being applied, check print quality settings
- Vertical lines running the full length of the page — usually a dirty encoder strip, not a nozzle problem
- Print head misalignment — produces blurry or doubled text, fixed through the alignment utility, not cleaning
Section 3: What Causes a Print Head to Clog?
Understanding the cause helps you choose the right fix and prevents the same problem happening again.
1. Inactivity — the most common cause by far
Inkjet printers rely on liquid ink that must stay fluid inside microscopic nozzle channels. When the printer sits unused, that ink stops moving. The water in the ink evaporates through the nozzle opening, and the remaining pigment or dye hardens into a plug. Home-use inkjet printers can begin clogging after just one to two weeks of no use. Office-grade models with better sealing may last a month without issues, but no inkjet is immune.
2. Low-quality or third-party ink
Generic inks often use different chemical formulas from the original manufacturer’s ink. They may dry faster, contain impurities that stick to nozzle walls, or have pigment particle sizes that are too large for the precision nozzles. Using non-genuine ink does not automatically cause clogs, but it increases the risk considerably — especially in Epson printers, which have particularly fine nozzle geometry.
3. Running too many cleaning cycles back to back
Counterintuitively, excessive automatic cleaning can make a clog worse. Each cleaning cycle pushes a large burst of ink through the nozzles to flush blockages. If the clog is not cleared, this can push dry ink particles deeper into the channel, making a mild clog into a severe one. Each cleaning cycle also consumes 10 to 25 percent of a full cartridge worth of ink.
4. Turning the printer off by unplugging instead of using the power button
When you press the power button correctly, the printer moves the print head to its parking position and seals the nozzles with a rubber cap. This cap slows evaporation significantly. When you yank the power cord, the head parks wherever it happens to be, with nozzles exposed to air. This dramatically accelerates drying.
5. Environmental factors
Dry air speeds up ink evaporation. The ideal relative humidity for printer storage and use is between 40 and 60 percent. If your office or home is drier than 40 percent relative humidity — common in winter with heating running — clogs form much faster. Dust and paper particles in the air can also land on exposed nozzles and contribute to blockages.
6. Running a cartridge until it is completely empty
When a cartridge runs completely dry, air enters the ink delivery channel. Air in the channel disrupts ink flow and, on some printer models, can permanently damage the print head by allowing it to fire without the cooling and lubricating effect of ink passing through. Replace cartridges when the printer alerts you, not after output quality degrades.
7. Expired or improperly stored ink
Ink cartridges have a shelf life of two to three years. Expired ink can thicken, develop sediment, or — in water-based inks — even grow mold. None of these conditions are ones the precision nozzle system was designed to handle. Store spare cartridges upright, in their original packaging, in a cool dry location away from direct sunlight.
Section 4: Automatic Print Head Cleaning (First Fix)
Every inkjet printer has a built-in cleaning utility that forces ink through the nozzles at higher pressure to dislodge mild blockages. Always try this first. If the clog is recent or mild, this alone may resolve it completely.
How to run the automatic cleaning cycle on Windows
- Open Control Panel and go to Devices and Printers.
- Right-click your printer and select Printing Preferences or Printer Properties.
- Find the Maintenance, Services, or Tools tab — the name varies by brand.
- Click Clean Print Head, Head Cleaning, or the equivalent option.
- Allow the cleaning cycle to finish completely. This typically takes one to three minutes.
- When prompted, print a nozzle check pattern to assess the result.
- If lines are still broken, run one more cleaning cycle. Wait at least five minutes between cycles.
How to run the automatic cleaning cycle on Mac
- Open System Settings (or System Preferences on older macOS) and click Printers and Scanners.
- Select your printer and click Options and Supplies, then Utility or Open Print Queue.
- In the print queue window, click the settings icon or navigate to Printer Utility.
- Select Clean Print Heads and follow the prompts.
How many cleaning cycles should you run?
Run a maximum of three automatic cleaning cycles before switching to a manual method. Running more than three consecutive cycles is counterproductive — it wastes a large amount of ink and can push dried ink deeper into the nozzles rather than flushing it out. If the nozzle check still shows broken lines after three cycles, move to the manual cleaning methods in the next section.
One effective technique: after three failed cleaning cycles, leave the printer turned off and unplugged overnight. The change in pressure as the printer cools can sometimes allow softened ink to drain away from partially cleared nozzles. Power it back on in the morning, run one more cleaning cycle, and check the nozzle pattern again before giving up on the automatic method.
Section 5: Manual Print Head Cleaning by Printer Brand
If automatic cleaning has not resolved the problem after two or three attempts, you need to clean the print head manually. The process differs significantly between brands because of how the print head is mounted inside the printer.
What you will need for manual cleaning
- Distilled water (not tap water — minerals in tap water can cause secondary blockages)
- Lint-free cloths or microfibre cloths
- Paper towels
- Cotton swabs
- Shallow dish or bowl for soaking
- Rubber gloves to protect your hands from ink stains
- Optional: dedicated print head cleaning solution (available online for around $10 to $15)
HP Printers — Manual Print Head Cleaning
Most HP inkjet printers (DeskJet, OfficeJet, ENVY series) have the print head built into each ink cartridge. This design makes cleaning straightforward because you can remove the head with the cartridge.
- Turn the printer on, then open the ink cartridge access door. Wait for the carriage to move to the center, then unplug the printer from the wall outlet. This locks the carriage in a position you can reach.
- Remove the ink cartridges one at a time. Do not leave them out of the printer for more than 30 minutes, as this allows the ink in the nozzles to begin drying.
- Set each cartridge aside on its side on a paper towel, with the nozzle plate facing away from the surface and not pointing down.
- Use a clean lint-free cloth very lightly dampened with distilled water to wipe the copper-colored electrical contacts on the side of each cartridge. Do not wipe or touch the nozzle plate itself at this stage.
- Fill a shallow dish with about 5mm of warm distilled water. Place the cartridge nozzle-side down so that only the nozzle plate is submerged. Do not submerge the electrical contacts or the cartridge body.
- Leave the cartridge to soak for 5 to 10 minutes for a mild clog, or up to 30 minutes for a more stubborn blockage. You should see ink beginning to dissolve into the water — this is the dried ink being loosened.
- Remove the cartridge and gently blot the nozzle plate on a paper towel. Do not rub, as this can damage the nozzles. Blotting only.
- Use a fresh damp cloth to wipe the print head contacts inside the printer carriage where the cartridges sit.
- Allow the cartridge nozzle plate to air dry for 5 to 10 minutes, then reinstall the cartridges and plug the printer back in.
- Run the automatic cleaning cycle once more, then print a nozzle check.
For HP printers with a separate print head unit (OfficeJet Pro 8000, 8600, 8610, 8620 series), the print head is a distinct component that can be removed independently of the cartridges. Lift the carriage latch, pull out the print head assembly, and soak the ink outlet nozzles in warm distilled water for 30 minutes. Dry gently and reinstall.
Epson Printers — Manual Print Head Cleaning
Epson printers have the print head permanently fixed inside the printer on a carriage. You cannot remove it without partially disassembling the machine, which is not recommended unless you have technical experience. The manual cleaning approach for Epson uses a syringe and cleaning solution to flush ink through the ink delivery ports without removing the head.
- Run a head cleaning cycle and immediately press the power button to begin powering down. As the carriage begins to move back to the parked position, unplug the printer. This stops the carriage in an accessible position in the middle of the printer.
- Remove all ink cartridges and set them upright on a paper towel.
- Place several layers of folded paper towel directly beneath the print head nozzles to catch any liquid.
- Fill a syringe (available in print head cleaning kits or from a pharmacy) with print head cleaning solution or warm distilled water.
- Attach a piece of narrow rubber or silicone tubing to the syringe tip. Connect the other end to one of the ink inlet ports — the small holes at the back of the carriage where each cartridge connects.
- Very slowly and gently push the plunger to send cleaning solution into the port. Stop if you feel significant resistance. Watch the paper towel beneath the head — you should see liquid beginning to come through as the solution dissolves dried ink.
- Repeat for each color channel.
- Leave the cleaning solution in the head for 30 to 60 minutes to dissolve stubborn dried ink deposits.
- Reinstall the cartridges, plug the printer back in, and allow it to initialize fully.
- Run the automatic cleaning utility twice, then print a nozzle check pattern.
Note: Epson EcoTank printers (ET series) use refillable ink tanks rather than cartridges. The cleaning approach is the same — the syringe and tubing method works via the tank inlet tubes. Do not attempt to remove the print head from an EcoTank printer.
Canon Printers — Manual Print Head Cleaning
Many Canon PIXMA and MAXIFY models have a removable print head assembly that is separate from the ink cartridges, making Canon one of the easiest brands to clean manually.
- Power on the printer, open the top cover, and wait for the carriage to move to the center. Then unplug the printer to lock the carriage in place.
- Remove all ink cartridges and set them aside.
- Locate the print head assembly — it sits directly in the carriage. On most Canon PIXMA models, lift the gray or black latch at the front of the carriage, then grip the print head by its sides and lift it straight up and out.
- Place several strips of tape over the gold electrical contacts and circuit chip on the print head to protect them from water. Do not let water touch the chip or the contacts at any point.
- Fill a shallow bowl with enough warm distilled water to submerge the ink nozzle area of the print head by about 5mm. Do not submerge the chip or contacts.
- Place the print head into the bowl with the nozzle side down. Allow it to soak for 30 minutes. For stubborn clogs, extend the soak to several hours or overnight.
- After soaking, flush the nozzles under warm running tap water for a few seconds. Hold the head so water flows through the nozzle side and out the top.
- Gently blot the nozzle plate dry with a paper towel. Do not rub.
- Remove the protective tape from the electrical contacts. Allow the print head to air dry for at least 15 minutes.
- Reinstall the print head (press firmly until the latch clicks), reinstall the cartridges, plug the printer back in, and run a cleaning cycle followed by a nozzle check.
Brother Printers — Manual Print Head Cleaning
Like Epson, Brother inkjet printers have the print head fixed permanently inside the machine on the carriage. However, on Brother machines the nozzle area is accessible from below the carriage when the head is parked in a certain position, allowing a paper towel method that is highly effective.
- Run a head cleaning cycle through the printer’s maintenance menu.
- As soon as the cleaning cycle starts and the carriage begins moving, unplug the power cord from the wall. This stops the carriage with the print head positioned in the center of the printer, over the paper feed area, where it is accessible.
- Open the printer cover and locate the print head. It will be in the center of the machine rather than at the far left (parked) position.
- Fold several sheets of paper towel and dampen them with warm distilled water or print head cleaning solution. Place the dampened towel directly beneath the print head nozzles.
- Gently press the carriage down so the nozzle plate makes firm contact with the damp paper towel. Hold for 10 to 15 seconds. You should see ink beginning to transfer onto the paper towel as the moisture loosens dried deposits.
- Move the towel to a clean section and repeat the process with a fresh damp area three to four times, or until ink transfers more cleanly and evenly onto the towel with each press.
- Close the printer cover, plug the power back in, and allow the printer to initialize fully — it will move the carriage back to the parked position automatically.
- Run one cleaning cycle through the maintenance menu, then print a nozzle check.
Section 6: Deep Cleaning for Severe & Stubborn Clogs
If manual cleaning has not produced improvement, the clog is either severe or the dried ink has been in place long enough to become very hard. Deep cleaning methods use longer soak times, stronger solutions, or specialized equipment to dissolve deposits that cannot be shifted by standard cleaning.
Method 3A: Extended Soaking in Distilled Water (Overnight)
This is the gentlest deep cleaning approach and the right starting point for a stubborn clog. It works best on removable print heads (HP cartridge-based heads, Canon removable heads).
- Remove the print head or cartridge as described in Section 5 for your brand.
- Fill a shallow bowl with warm distilled water — warm enough that you can hold your hand in it comfortably, but not boiling.
- Place the nozzle side of the print head or cartridge face-down in the water, submerging only the nozzle plate by 3 to 5mm. Keep the electrical contacts completely out of the water.
- Leave it overnight — 8 to 12 hours. The extended contact time allows water to slowly hydrate and dissolve even well-hardened ink deposits.
- In the morning, remove the head and blot the nozzle plate gently on a clean paper towel. You should see significant ink release on the towel.
- Allow to air dry for 15 minutes, reinstall, and run a cleaning cycle.
Method 3B: Dedicated Print Head Cleaning Solution
Commercially available print head cleaning solutions are formulated with solvents that break down dried ink more effectively than plain water. They typically contain a mixture of distilled water, isopropyl alcohol, and surfactants that allow the solution to penetrate dried pigment deposits.
Use a cleaning solution kit that includes a syringe and appropriate nozzle adapters. Follow the syringe injection method described in the Epson section above, using the cleaning solution instead of plain water. Allow the solution to sit in the nozzles for 30 to 60 minutes before running a cleaning cycle.
This method is appropriate for all brands and both removable and fixed print heads.
Method 3C: Ammonia-Based Solution (Windex Method)
Windex window cleaner contains approximately 4 to 5 percent ammonia, which is an effective solvent for dried ink. This method works well for stubborn clogs but should be used carefully and only when plain water has not worked.
- Use blue Windex (not green or other variants) diluted 50/50 with distilled water.
- Apply the solution using the syringe method or by soaking the nozzle plate, as appropriate for your printer brand.
- Soak for a maximum of two to four hours. Do not leave ammonia-based solutions in contact with print head components for extended periods, as ammonia can degrade some rubber seals and plastics over time.
- After soaking, flush the nozzle area with plain distilled water to remove ammonia residue before reinstalling.
Method 3D: Ultrasonic Cleaning (For Removable Print Heads)
An ultrasonic cleaner uses high-frequency sound waves to create microscopic bubbles in a liquid. When these bubbles collapse, they produce tiny shockwaves that dislodge debris from surfaces — including dried ink inside nozzle channels. This is the most thorough cleaning method available without professional tools.
- Remove the print head assembly from the printer (applicable for HP cartridge-based heads and Canon removable heads).
- Protect all electrical contacts and chips with waterproof tape.
- Fill the ultrasonic cleaner with a mixture of distilled water and a small amount of print head cleaning solution or isopropyl alcohol (10 to 15 percent concentration).
- Place the print head in the cleaner basket so the nozzle area is submerged but the protected contacts are above the liquid line if possible.
- Run the ultrasonic cleaner for 3 to 5 minutes. Check the liquid — it should be turning dark with dissolved ink.
- Remove the head, rinse gently with distilled water, and blot dry. Allow to air dry for 20 minutes before reinstalling.
Section 7: Best Cleaning Liquids for Print Heads (Safe vs. Bad)
The choice of cleaning liquid significantly affects both the success of your cleaning and the long-term health of your print head. Here is a complete reference.
| Liquid | Effectiveness | Safe for print heads? | Best used for | Notes |
|---|---|---|---|---|
| Distilled water (warm) | Moderate | Yes — completely safe | Recent or mild clogs | Safest option. Always use distilled, never tap. Minerals in tap water can cause secondary blockages. |
| Dedicated print head cleaning solution | High | Yes — designed for this purpose | Moderate to severe clogs | Best overall choice for stubborn clogs. Available online for $10 to $20 per kit. |
| Isopropyl alcohol (70% or lower) | High | Mostly — use diluted | Dried pigment ink clogs | Dilute to no more than 30% isopropyl with distilled water before applying to nozzles. Higher concentrations can damage rubber seals. |
| Windex (blue, ammonia-based) | High | Use with caution | Stubborn old clogs when other methods have failed | Dilute 50/50 with distilled water. Maximum contact time 4 hours. Flush with plain distilled water afterward. |
| Tap water | Low | Not recommended | Emergency use only | Minerals in tap water deposit inside nozzle channels and can create new blockages. Always use distilled. |
| Pure isopropyl alcohol (90% or higher) | High on ink, but dangerous | No | Do not use on nozzles | Too aggressive. Can dissolve rubber seals and damage nozzle coatings. Only safe for wiping electrical contacts. |
| Vinegar | Very low | No | Do not use | Acetic acid content can corrode metal nozzle components. Widely suggested online but not effective and potentially damaging. |
| Bleach or household cleaners | Damaging | No — will cause damage | Never | Will permanently damage nozzle coatings and internal components. Do not use under any circumstances. |
Section 8: When to Replace a Print Head Instead of Cleaning
Not every clogged print head can be saved, and continuing to clean a permanently damaged head wastes time, money, and ink. Use this section to decide when to stop. If you need to purchase thermal printheads, please visit our product catalog!
Signs that cleaning is not going to work
- No improvement at all after three automatic cleaning cycles and one manual cleaning session
- The nozzle check pattern shows identical results before and after cleaning — suggesting the blockage is not dissolving
- Visible physical damage on the nozzle plate — cracks, bent nozzle pins, or discoloration that suggests chemical damage from previous cleaning attempts
- Ink is leaking onto the carriage area or pooling below the head rather than flowing through the nozzles
- The printer is showing hardware error codes related to the print head, not just print quality warnings
Replace the print head or replace the printer? A practical framework
The answer depends on which type of print head your printer has and what a replacement costs.
Cartridge-based print heads (most HP DeskJet and OfficeJet models): The print head is built into the ink cartridge. Replacing the cartridge replaces the head. Cost: $15 to $40 for a genuine cartridge. This is almost always worth doing before replacing the printer.
Separate removable print heads (HP OfficeJet Pro 8600 series, Canon PIXMA Pro series): Print heads cost between $30 and $80 depending on the model. If the printer is otherwise in good condition and less than four years old, replacement is usually worthwhile. Compare the print head price to the cost of a comparable new printer before deciding.
Fixed integrated print heads (Epson, Brother, and many Canon models): The print head cannot be easily replaced without professional service. Epson replacement print heads, where available, can cost $80 to $200 or more — sometimes approaching or exceeding the price of a new entry-level printer. In this case, a practical decision tree looks like this:
- Is the printer less than two years old? Consider manufacturer warranty repair or authorized service.
- Is the print head cost more than 50 percent of a comparable new printer? Replacing the printer is usually the better financial choice.
- Is the printer more than four years old? Factor in that other components are also aging and may fail soon. A new printer is likely the better long-term investment.
How long does a print head last under normal use?
Under normal conditions — regular use with genuine ink, proper shutdown every time, and occasional cleaning cycles — a print head should last the lifetime of the printer, typically four to seven years. Premature failure almost always comes from prolonged inactivity, use of incompatible ink, or attempting aggressive cleaning that damages nozzle coatings.
Section 9: How to Prevent Print Head Clogs Long-Term
Prevention is far more effective than treatment. These eight practices will eliminate most clogs before they start.
1. Print at least once per week
The single most effective prevention method. Even a small test print — a color page, a nozzle check pattern, or any document that uses all four colors — keeps ink flowing through every nozzle channel and prevents the dry-out process from starting. If you genuinely have nothing to print, schedule a weekly nozzle check. It uses minimal ink and takes 30 seconds.
2. Always power off with the power button, never by unplugging
The correct shutdown procedure moves the print head to its parked position and seals the nozzles with a rubber cap that dramatically slows evaporation. Simply unplugging the printer bypasses this process entirely, leaving the nozzles exposed to air. Make this a strict habit.
3. Use genuine or high-quality compatible ink
Original manufacturer ink is formulated specifically for your printer’s nozzle geometry and materials. If you use compatible third-party ink, choose brands with good reputations rather than the cheapest available. Cheap generic inks vary enormously in quality and are a leading cause of clogging in printers that were previously problem-free.
4. Replace cartridges before they are completely empty
When a cartridge runs completely out of ink, air enters the ink channel. Air in the system can disrupt ink flow and, in some printer models, can cause the print head to fire without ink — a condition that damages the nozzle heating elements. Replace cartridges when the printer alerts you that ink is low, not after quality begins to degrade.
5. Keep the printer environment between 40 and 60 percent relative humidity
Dry air is one of the most significant environmental factors in print head clogging. If you live or work in a dry climate, or use central heating in winter that reduces indoor humidity, consider placing a small humidifier near your printer. Avoid positioning the printer near heating vents, air conditioning units, or in direct sunlight, all of which create localized dry conditions.
6. Cover the printer when not in use
Dust and paper particles that settle on the print head area can contribute to blockages. A simple dust cover — even a cloth draped over the printer — dramatically reduces particulate buildup. Keep the printer in a low-traffic area away from paper cutting, crafting, or other activities that generate fine airborne particles.
7. Run one preventive cleaning cycle per month if you print infrequently
If your printer sits unused for weeks at a time, one preventive cleaning cycle per month keeps nozzles clear without wasting excessive ink. This is far less damaging than a heavy cleaning cycle required to clear a fully developed clog. Think of it as the equivalent of periodically running an engine that has been sitting — small, regular maintenance prevents large, expensive repairs.
8. Prepare correctly if storing the printer for more than two weeks
If you are going away or know the printer will not be used for an extended period:
- Power off correctly using the power button, never by unplugging. The sealed parking position is critical for long-term storage.
- Store the printer in a cool, dry, dark location. Avoid garages, attics, or anywhere with wide temperature swings or high humidity.
- On return, power on and run one automatic cleaning cycle before printing anything important.
- For storage exceeding one month, manufacturers including Epson recommend running a nozzle check at minimum every two weeks, even during the storage period, to circulate ink through the channels.
Section 10: Clogged Print Head FAQs
How do I know if my print head is clogged versus another type of printer problem?
Run a nozzle check pattern through the printer’s maintenance menu. If the test pattern shows broken horizontal lines, missing color rows, or incomplete sections, the print head is clogged. If the test pattern prints perfectly and the problem only appears in your documents, the issue is likely a software setting, driver problem, or paper-type mismatch — not a clog.
Can I clean a print head with plain water?
Yes, but only with distilled water — never tap water. The minerals in tap water (calcium, magnesium, and others) can deposit inside nozzle channels and create secondary blockages that are harder to remove than the original clog. Warm distilled water is safe for soaking and is the right starting point for mild to moderate clogs. For severe clogs, a dedicated cleaning solution works more effectively.
How many cleaning cycles should I run before switching to manual cleaning?
No more than three consecutive automatic cleaning cycles. After three cycles without improvement, additional cycles are very unlikely to help and will waste a significant amount of ink — each cycle uses 10 to 25 percent of a cartridge’s worth of ink. Switch to a manual cleaning method instead. If three cycles produce partial improvement, try leaving the printer off overnight before running a final cycle in the morning.
Why does my print head keep clogging even after I clean it?
Recurring clogs almost always have one of three causes: the printer is not being used frequently enough between clogs (the minimum is one print per week for most inkjet models), low-quality or incompatible third-party ink is being used, or the printer is stored in a very dry environment. Address the root cause, not just the symptoms. If you are printing regularly with good ink and the head keeps clogging, the print head itself may be reaching the end of its service life.
Is isopropyl alcohol safe to use for cleaning a print head?
Only in diluted form. Isopropyl alcohol at concentrations of 30 percent or lower mixed with distilled water is an effective solvent for dried ink and is safe for most print head materials. Isopropyl alcohol at 70 percent or higher should not be applied to the nozzle plate or ink channels — it can degrade rubber seals and some nozzle coatings over time. Pure isopropyl alcohol (90 percent and above) should only be used to clean the electrical contacts on cartridges, not the nozzles themselves.
Can a print head be permanently damaged by a clog?
Yes. If a clog is left untreated for a long time, the dried ink can harden so thoroughly that the nozzle channel is physically blocked beyond what cleaning can dissolve. Additionally, if the printer is operated with a severely clogged head, the print head heating elements — which fire ink droplets — can burn out from the heat of firing without ink flowing through them. The longer a clog goes untreated, the lower the probability of a full recovery.
How long does it take for ink to dry inside a print head?
It depends on the printer design, the type of ink, and the environment. In a printer with a good nozzle cap seal and moderate humidity, ink in an unused head can stay usable for two to four weeks. In a dry environment, near a heat source, or in a printer with a worn nozzle cap seal, drying can begin within just a few days. Pigment-based inks (used by many photo printers) tend to be more prone to clogging than dye-based inks. Epson printers with very fine nozzle geometry are particularly sensitive to inactivity.
Is it cheaper to replace the print head or buy a new printer?
It depends on the printer type. For HP DeskJet and OfficeJet models where the head is built into the cartridge, replacing the cartridge (and therefore the head) costs $15 to $40 — almost always worth it. For separate removable heads on mid-range Canon or HP OfficeJet Pro models, replacement heads cost $30 to $80 — worth doing if the printer is otherwise functional and relatively new. For Epson and Brother printers with permanently installed heads, professional replacement can cost more than a new printer of the same tier. In those cases, compare the service quote with the price of a new comparable model.
Can I use Windex to clean my print head?
Blue Windex (ammonia-based) diluted 50/50 with distilled water is an effective cleaning solution for stubborn clogs. Ammonia is a good solvent for dried ink. However, it should not be used as the first approach — start with plain distilled water or a dedicated cleaning solution. If you use Windex, limit contact time to four hours maximum and flush the nozzle area with plain distilled water afterward to remove any ammonia residue that could affect the rubber seals over time.
Why is my printer printing blank pages when the ink cartridges are full?
Blank pages with full ink levels almost always indicate a severe print head clog — the nozzles are so thoroughly blocked that no ink is passing through at all, even though the cartridges contain plenty of ink. Start with three automatic cleaning cycles. If the pages remain blank, proceed to the manual cleaning method for your brand in Section 5. If manual cleaning does not improve output, move to the deep cleaning methods in Section 6, particularly the extended overnight soak.
Does Epson’s EcoTank system clog less than standard cartridge printers?
EcoTank printers use the same inkjet print head technology and are subject to the same clogging risks from inactivity. The larger ink reservoir does mean you can print more frequently without running out of ink — which indirectly reduces clogging risk — but the print head itself is no more resistant to drying than any other Epson inkjet print head. The prevention habits in Section 9 apply equally to EcoTank models.
